Communication Banner
Implement a simple, low-code communication or announcement banner across high-visibility or high-traffic areas of your site.
Further customizations than what is detailed here should be provided by your in-house web design and development resources.
Prerequisites
- Admin role (Control Panel access - optional)
- Page or template edit permissions
Banner style
Modify the CSS below to control the look of the banner, replacing the # with your desired hex color codes. You can add this CSS to your site's Custom site CSS (in Control Panel) or within a CSS widget on the specific page where the banner will be placed.
.announcement {
    border: none;
    width: 100%;
}

.announcement thead {
    text-align: center;
}

.announcement th {
    background: # ; /* announcement background color*/
    border: none;
    padding: 12px 8px;
    color: # ; /* announcement text color */
}

.announcement th a {
    color: # ; /* announcement link color */
    text-decoration: underline;
}

.announcement th a:hover {
    color: # ; /* announcement link color on hover */
    text-decoration: underline;
}

.announcement th a:focus {
    color: # ; /* announcement link color on focus */
    outline: 1px dotted # ; /* announcement link outline color on focus. change to match focus link color */
}
Banner component
Create the banner component containing your message copy in the WYSIWYG editor using a 1×1 table.
- Enter edit mode on the desired page or template
- Create a 1×1 table.
- Open the table context menu (right-click for Windows, or ∧+click for Mac) and select Table properties.
- In the Table properties modal, configure the table as follows:
- Headings selections:
Select First row.
Select First column. - Stylesheet classes: announcement
- Deselect Make table responsive.
- Width: 100%
- Caption field empty
- Summary field (accessibility description)
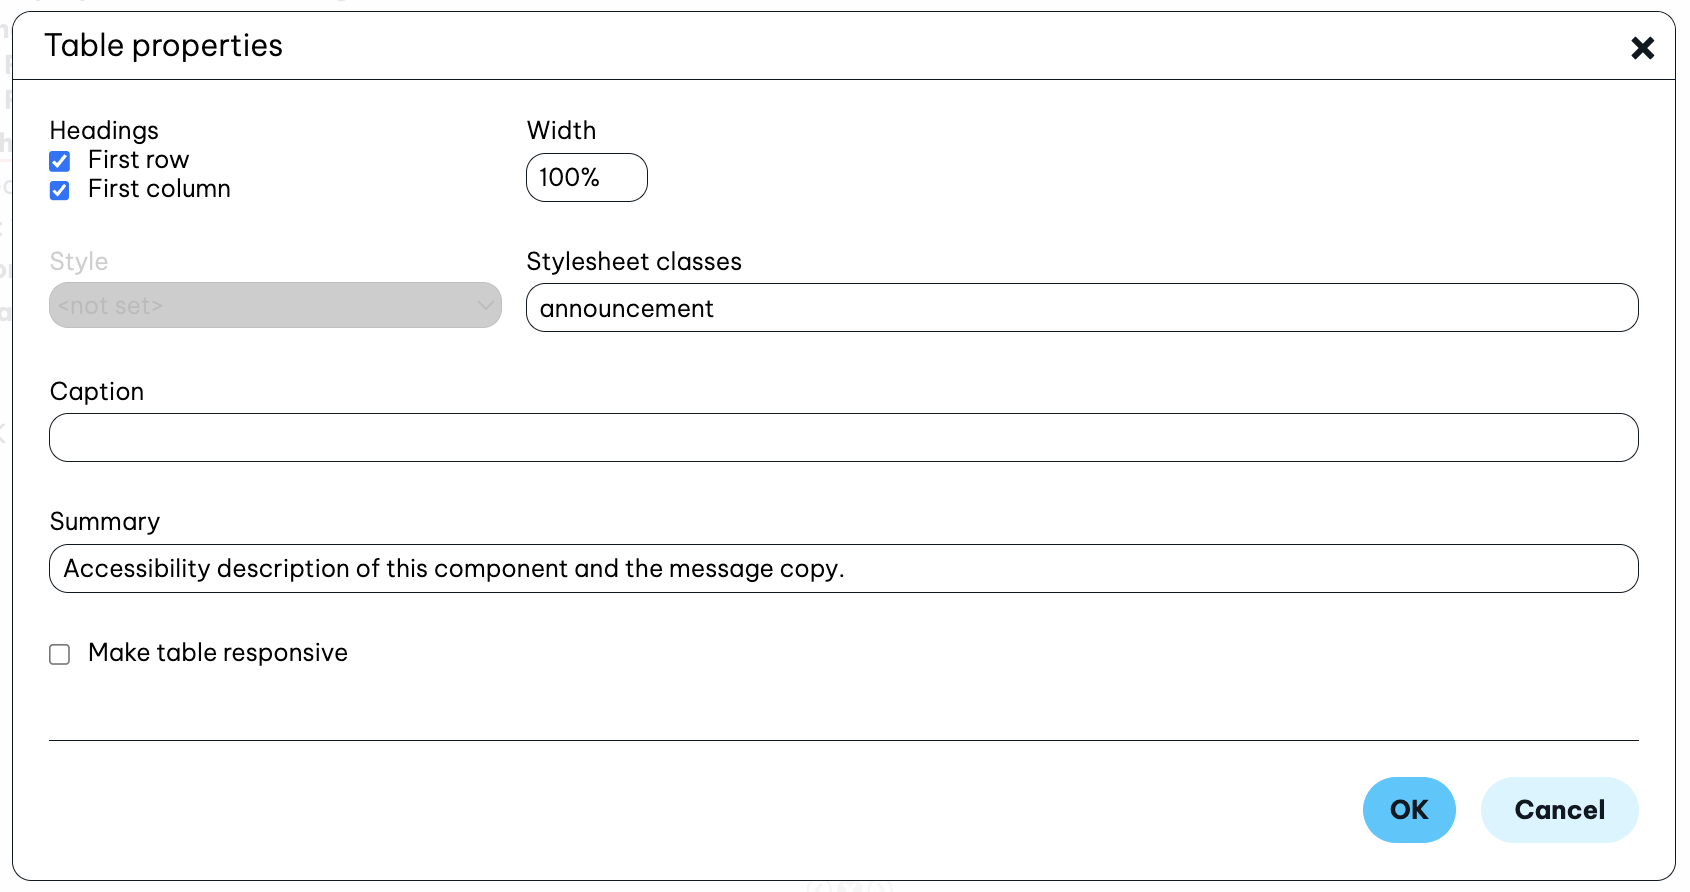
- Headings selections:
- Select OK in the Table properties modal and save your edit.
- Publish your changes if they were made to a draft.
Examples
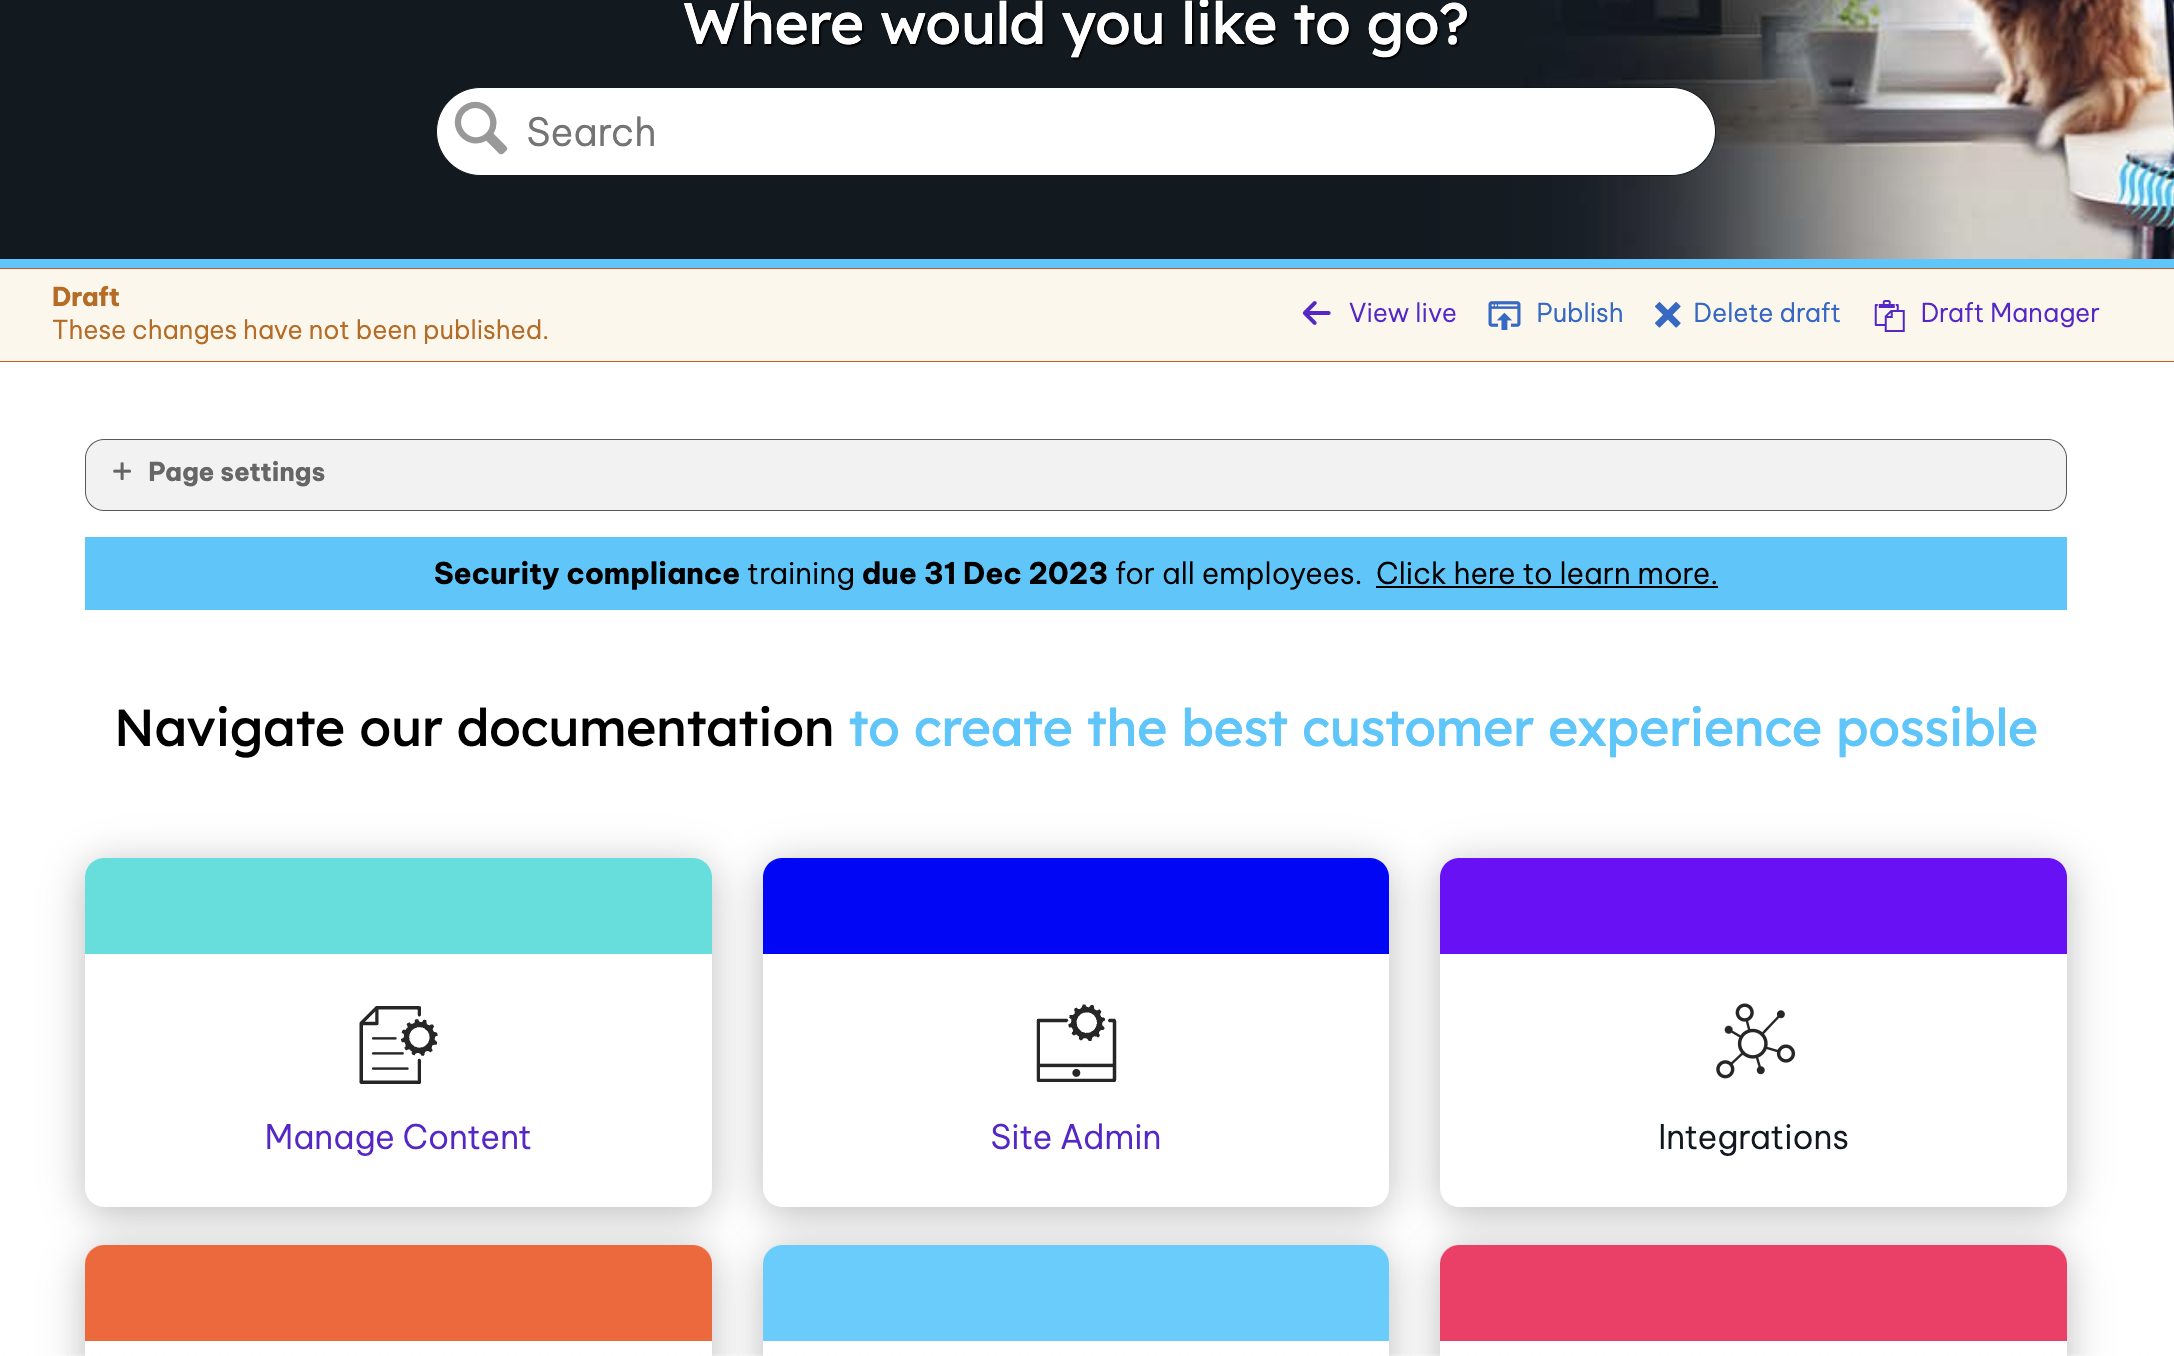
- The component added to this article:
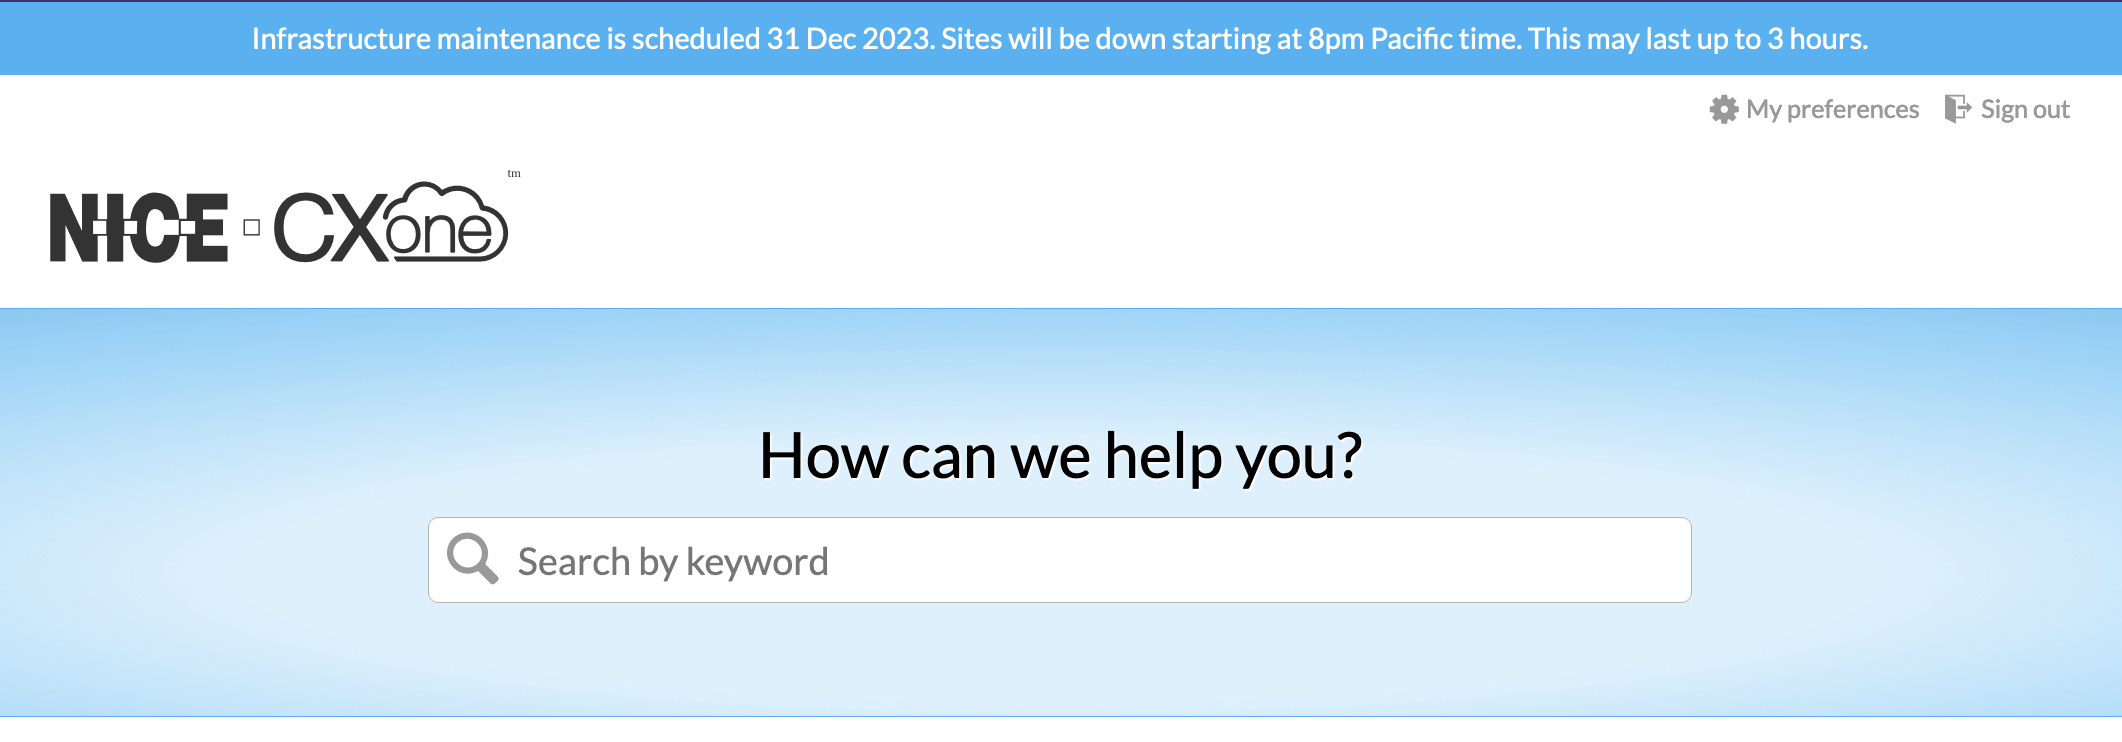
View our most recent release notes to stay up to date. - When added to the Site Header template, to appear across the site:
- When added to a specific page: