Add a table
- Applies to:
- All versions
- Role required:
- Draft Contributor
Add tables to your content, which are automatically responsive in Expert.
Insert a table
- Open a page in Edit mode.
- Select Elements > Table or select the Table icon
 from the Editor Toolbar.
 - Highlight the number of rows and columns you want to appear in your table.
Add or remove rows and columns
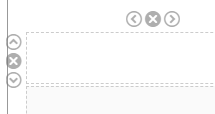
- Click anywhere in the table and arrow icons are visible next to the first cell in the respective row and column.

- Click the arrows to add columns or rows in either direction of the cell, or click the X above the cell to remove that row or column.

