Contextual Help Touchpoint
- Applies to:
- CXone Mpower Expert (current)
- Role required:
- Admin
Embed contextual help links in any web property or application that connects to your Expert content.
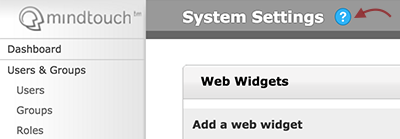
Contextual Help links can add helpful information to your e-commerce site or anywhere that a user is trying to accomplish a task. The contextual help link can look like an ordinary link or be styled as a question mark or information symbol.
Customer experience
- Users encounter a contextual help link and click it.

- An interactive pop-up window displays the page you designated during setup.
- Users can further navigate content on your site:
- Back: Displays the page previously viewed in the contextual help dialog
- Forward: Displays the next page viewed in the contextual help dialog
- Home: Takes users to the home page of your site
- Open article: Opens the current article inside your site in a new tab or window
- The search bar allows users to search your site for additional content.
Prerequisites
- Admin access to your site
- Developer access to the web property or application where you will embed the Contextual Help Touchpoint
- License for the Touchpoint
Implement a Contextual Help Touchpoint
- Navigate to Site Tools > Dashboard > Integrations > Touchpoints Management.
- Select Create a Touchpoint > Contextual Help > Select Type.
- Fill in the configuration fields:
- Name: A unique name to easily identify the Touchpoint
- Host: Host name or domain where the Touchpoint will be embedded (comma-separated host names and wildcards are allowed)
- Description: Optional description
- Custom CSS: Optional custom styling
- Custom CSS selector: CSS class name that identifies your contextual help links that trigger your contextual help dialog (the default CSS selector is .F1)
- Display back button: Toggle button on or off to appear in the Contextual Help window, with configurable label or tooltip text (default is Back)
- Display forward button: Toggle button on or off to appear in the Contextual Help window, with configurable label or tooltip text (default is Forward)
- Display home button: Toggle button on or off to appear in the Contextual Help window, with configurable label or tooltip text (default is Home)
- Display open article button: Toggle button on or off to appear in the Contextual Help window, with configurable label or tooltip text (default is Open Article)
- Display search box: Toggle search box on or off to appear in the Contextual Help window, with configurable default filter for search results or input text to appear in search field (default is Search)
- Select Add this Touchpoint > Copy code to clipboard.

- Embed the Touchpoint code into the HTML of any web property or application for which that Touchpoint is configured.
The code must be placed in the body section, not the head section of your HTML.
Test the Contextual Help Touchpoint
To trigger your contextual help dialog, add a link via <a> tags to your HTML code that includes a class to which you assign the Custom CSS selector specified during configuration (F1 by default).

You can also use a custom content ID if you want to dynamically update external links.

To test the Contextual Help Touchpoint, open your web page or application where you embedded the Touchpoint and click the link to verify the Contextual Help Touchpoint loads the configured page.

