Manage users
- Applies to:
- All versions
- Role required:
- Admin
Find users
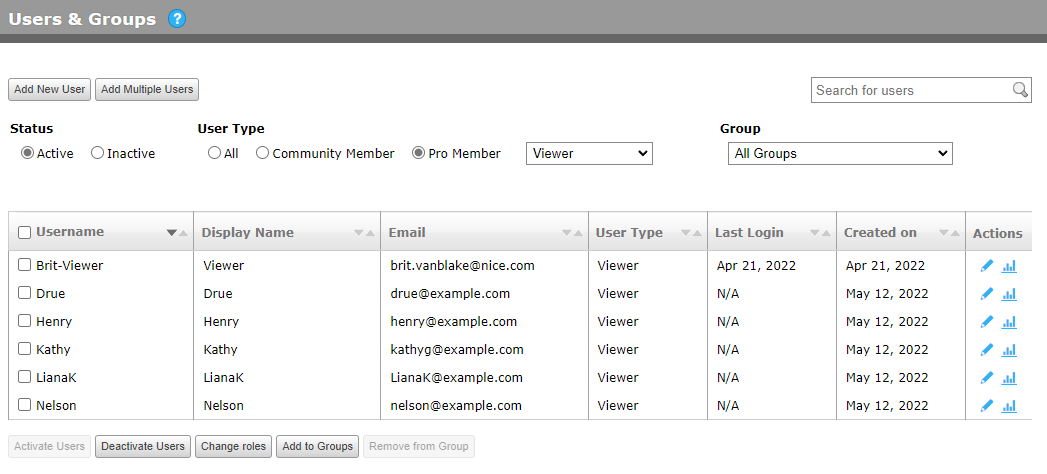
- Navigate to Site tools > Control panel > Users & Groups > Users.

There is a 1,000 display limit for the number of users that can be shown. As you add filters and leverage search, the number of results will be under this limit. If you reach the 1,000 user limit you will see the following notification:

- Narrow the displayed users by using the table filters:
- Search for users: The search box allows you to search the Username, Display Name, and Email.
- If you are searching for a domain in the email, such as @example.com make sure you include @ in your search request. If you enter example.com, Expert will not find the email domain.
- Search will not find partial matches with the middle of a term. For example, if you search for "prince" you may get results for "princess" too, since it is a continuation of the search term. However, if you search for "point" you will not see results for "touchpoint".
- Group: Only see users belonging to the group selected from the drop-down menu.
- User Type: By default, the user type is set to Pro Member. Filter by selecting a role from the drop-down menu or changing the user type to Community Member.
- Status: By default, the status is set to Active, which shows only active users. Selecting the Inactive radio button, you will see all of the users that you have deactivated.
- Search for users: The search box allows you to search the Username, Display Name, and Email.
Add users
If you are authenticating via SAML SSO, read how to add users through your IdP.
- Click Add New User.
- Add details:
- Username: The name users use to login to the site. If you have single sign-on (SSO) set up, this is the username from the identity provider (IdP). Do not use spaces or the search function may not find the user.
- Display Name: The display name shown in the interface when a user leaves a comment, edits a page, or is logged in. If no display name is entered, the username is displayed.
- Email: The email to which notifications are sent from the system. For added protection, we recommend not using an email address as a username/display name.
- Password: Leave blank if you prefer the user be sent a system-generated password. The password MUST be a minimum of 8 characters in length and must contain at least 3 of the following characters: lowercase, uppercase, digits, and symbols.
- Seat Management: Assign either the Community Member or Pro Member role.
- Community Members cannot contribute to your documentation and cannot be assigned a Pro Member role.
- Pro Members are assigned roles to specify their editorial privileges on the site. If you choose Pro Member, select a role form the drop-down menu.
- Authentication: Determine whether you want the user created locally or through SSO IdP.
- Add to Groups: Add to applicable groups, if any, by checking the groups in the list.
- Click Add User.
After you add a new user, they will receive a confirmation email containing a link to your site and access details. Remind the user to sign in and reset their password by selecting the "forgot password" option at login.
User email addresses are used for all communications from your Expert site, so also remind users to add your site to their email's allow list. This will remove your site from any spam filters, which ensures the user receives important information and notifications.
Edit users
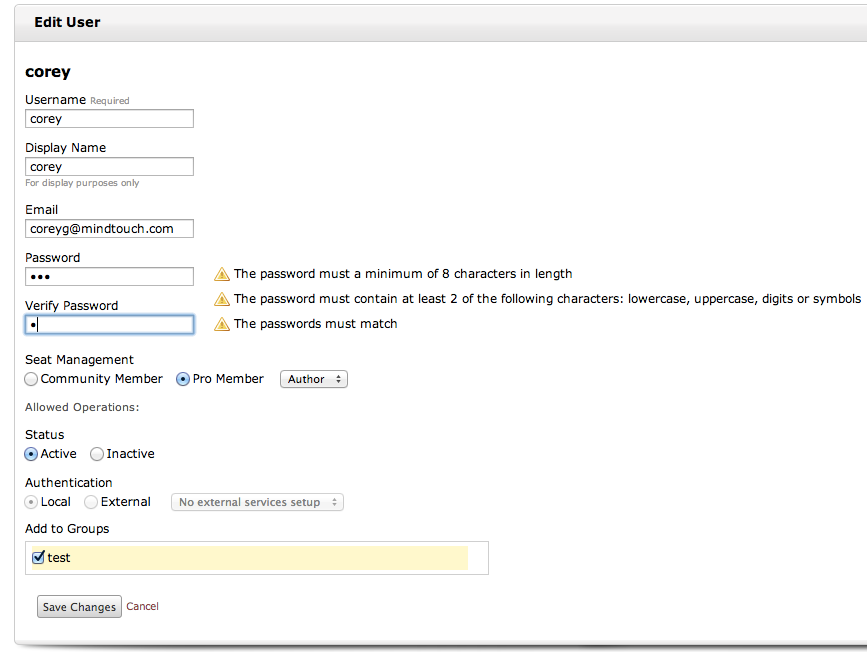
- To edit a user, click the Edit icon at the end of a user row.

- Modify details as needed:
- Username: The name users use to login to the site. If you have single sign-on (SSO) set up, this is the username from the identity provider (IdP).
- Display Name: The display name shown in the interface when a user leaves a comment, edits a page, or is logged in. If no display name is entered, the username is displayed.
- Email: The email to which notifications are sent from the system.
- Password: The password MUST be a minimum of 8 characters in length and must contain at least 2 of the following characters: lowercase, uppercase, digits or symbols.
- Seat Management: Indicates whether the user is a Community Member (viewer) or Pro Member (contributor). Pro Members are assigned roles to specify their editorial privileges on the site. If you choose Pro Member, select a role form the drop-down menu.
- Status: Deactivate or activate a user.
- Authentication: By default, the authentication is set to Local, unless you have LDAP / AD integration.
- Add to Groups: Add or remove users from groups by checking/unchecking the groups in the list.
- Click Save Changes.

To batch edit user roles, select multiple checkboxes (to the left of the usernames) and click Change Roles.

Deactivate users
Users cannot be deleted. Deactivate users to safely disable their access and ensure that all content created is maintained.
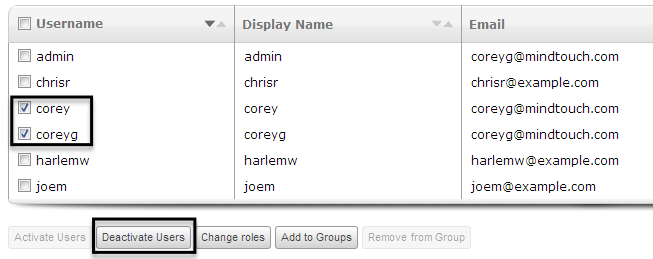
To deactivate users, select a user or multiple users from the list and click Deactivate Users (the button is only available when active users are selected).

Deactivated users automatically become Community Members for security. Community Members can view content on your site but cannot make any changes to content, and they fill limited Pro Member seats.
Activate users
For security, a user account with multiple failed login attempts is automatically set to inactive, and their group associations remain connected but inactive.
- Filter by the Inactive status, select the users you want to activate, and click Activate. The button is only clickable when inactive users are selected.

- If the user was formerly a Pro Member, the account is automatically switched to Community Member when made inactive. You can change the user back to Pro Member status if needed by editing the user.

