
How to use Schedule Publish
- Applies to:
- CXone Mpower Expert (current)
Publication scheduling follows a specific set of rules, some of which already exist in NiCE KM, and others which are unique to this functionality.
Scheduling
Scheduling functionality enables users to publish drafts and unpublish pages at a future date and time, with the ability to extend a schedule for a page to all its sub-pages. Users follow the same flow as on-demand publish and unpublish to create, update, or delete schedules.
The publication service takes inventory of content at the time the service starts, rather than at the time the schedule is created, so you can extend a schedule to sub-pages even if no sub-pages currently exist. This allows you to be proactive in scheduling on a parent page where sub-pages will eventually be created.
Schedule a draft to publish
- Navigate to the draft.
- Click Publish in the page status bar.
A popup window will appear with options to publish now or later. Now will be selected by default. - Select the Publish later radio button.
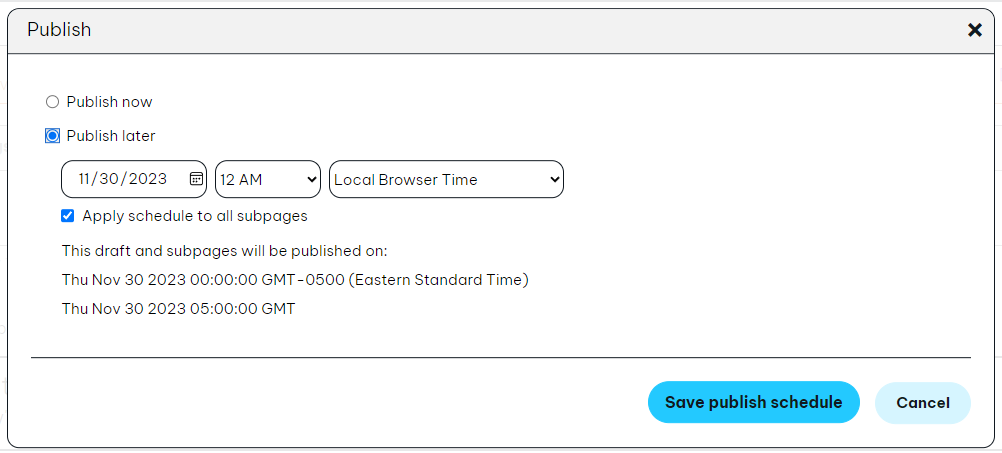
- Set the date and time you want the draft to be published.
You can select the time based on local browser time or UTC-GMT. - By default, sub-pages will be published along with the draft.
Uncheck the box if you want to publish them at another time. - Click Save publish schedule.
- A confirmation message will display and the draft status bar will note that a publish schedule exists for the specified date and time (in the current user's browser-defined time zone).

Modify a publish schedule
- Navigate to the draft.
- Click Publish in the page status bar.
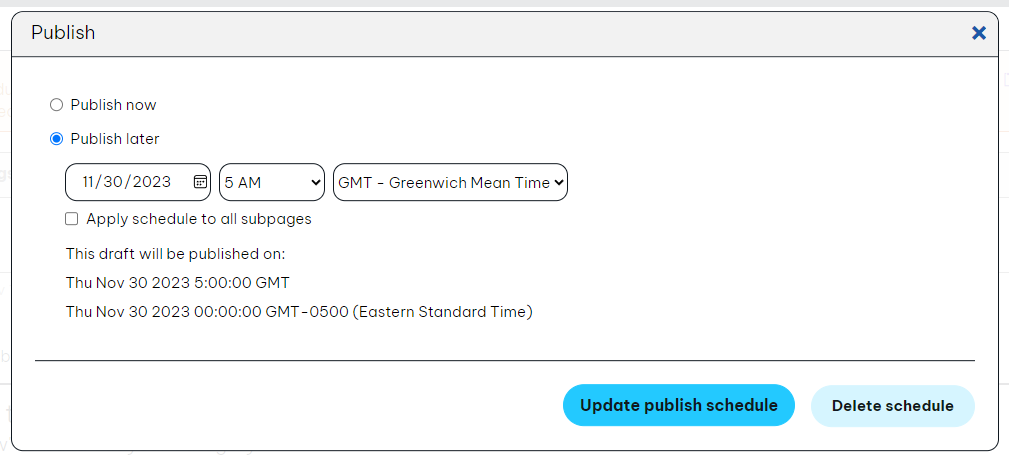
A popup window will appear. - To modify the schedule, change the settings as needed, then click the Update publish schedule button.
- To delete the schedule, click the Delete schedule button.
Schedule a live page to unpublish
- Navigate to the page.
- Click Options > Unpublish page.
- A popup window will appear with options to unpublish now or later. Now will be selected by default.
- Select the Unpublish later radio button.
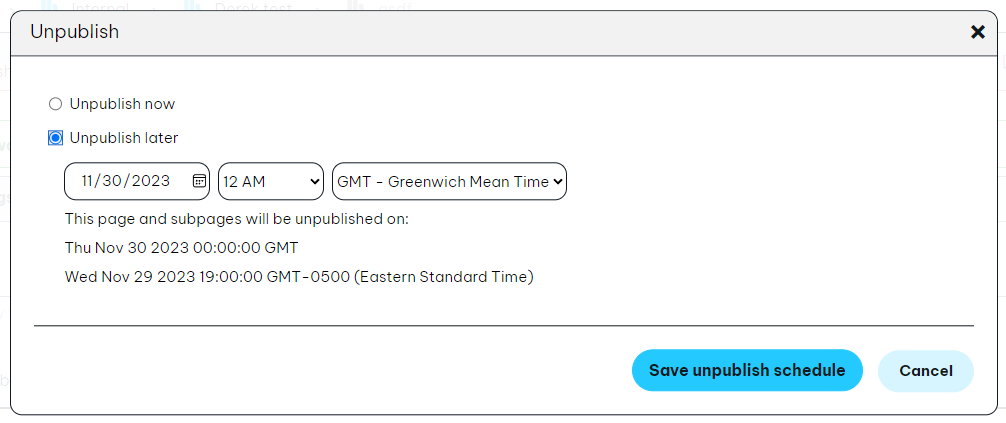
- Set the date and time you want the page to be unpublished.
You can select the time based on local browser time or UTC-GMT. - "Apply to sub-pages" is enforced because a page cannot be unpublished when published sub-pages are present.
- Click Save unpublish schedule.
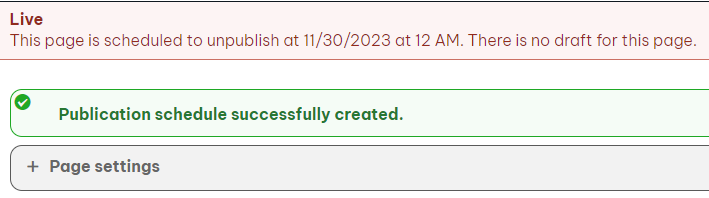
- A confirmation message will display and the page status bar will note that an unpublish schedule exists for the specified date and time (in the current user's browser-defined time zone).
Modify an unpublish schedule
- Navigate to the draft.
- Click Options > Unpublish page in the page status bar.
A popup window will appear. - To modify the schedule, change the settings as needed, then click the Update unpublish schedule button.
- To delete the schedule, click the Delete schedule button.
Notifications
An e-mail is sent to the user who created or last modified a schedule once the job completes. The notification includes the page title, whether sub-pages were included, and a link to the publication job log. The log details the individual events the publication job was comprised of and when each event occurred.
Reports
Admin users can download a CSV of all current publish and unpublish schedules across the site from the Publication Queue within Dashboard.
The CSV includes information about the page the schedule was created for, whether sub-pages are included in the schedule (for publish only), and the date and time of the schedule (in GMT-UTC).
Once a scheduled publication has completed, publish and unpublish events are reported in Site History and Draft History.
API
The API call returns a CSV file with all drafts with scheduled publish, and all published pages with scheduled unpublish.
Endpoint: /@api/deki/schedules/reports/publicationschedules.csv
Limitations
- If a schedule has already been created and you publish or unpublish the page on-demand, the schedule will be deleted and only the current page will be published or unpublished.
- There is a 100 scheduled job (publish or unpublish request) limit per site.
Note: a scheduled job will not always equate to one page, given the Apply to sub-pages option. - Schedules must be within one year from the current date.